
My Basic Guide to Cleaning
+2
Firebladeradmin
craigs23
6 posters
www.firebladeriders.org :: Fireblade Knowledgebase and Tech Help :: Technical Hints and Tips :: Idiots Guides
Page 1 of 1

My Basic Guide to Cleaning
![]() by craigs23 Thu 10 Jan 2008, 20:04
by craigs23 Thu 10 Jan 2008, 20:04
This was written quite a while ago (back in the days when I owned an RRN), so some of the tips may be old hat now (I'm constantly gaining experience in this hobby), but may be of some use?
Having written this for a couple of other forums (don't worry, not in one go (I hope I'm not that sad)), I thought I might add a few tips and tricks of the trade here.
With the sun ready to raise once again, how about a spot of spring cleaning?
Anyway, cleaning my bike is kind of like a maintenance routine - some think I'm quite obsessive when it comes to keeping the grime off, but I look at it as more an appreciation for the bike. I also like to take the opputunity to make sure everything is in tip top working order. More often then not, a proper clean also requires a strip down, and a disassemberly of surrounding parts, so all the nooks and crannies can be sorted.
The key, is in the details. Viewers of the bike tend to see it as a whole and won't spot every single change you've made (even, in some cases (like me), it's down to almost every last nut and bolt). However, I believe that if the minor details are also considered, the finished result is so much better. Far too often, I see a few bikes with spotless paintjobs, but the infrastructure underneath is a right pig (kind of like the Konica actually).
I've found cleaning a bike is never complete; even if, to the 'untrained eye' no work appears to need doing or that it very rarely sees rain. There will always be something that requires attention, a stonechip that requires polishing out, a bolt that's showing some corrosion. The only time a bike appears to be mint is when it rolls off the production line, or someone's got really anal about keeping their bike wrapped in cotton wool (and where's the fun in that). Nothing wrong with that, as there's always something to strive for.
But, mint, in those cases, is not pracitical, so best to aim for 'very good condition'. (Unlike now, a couple of years ago, I used my bikes as commuters, all year round, in all weathers. The RVF, in the early months of ownership saw everything the cruel British winter could throw at it, so offers a good base for realistic cleaning). Such a project wasn't done over night - it took 9 months. After a 'general clean' I'll clean/polish some other area that I hadn't got round to yet (for example; if I had been using the bike during the week; giving it a clean and it had remained cleani up to the weekend, there would still be some areas that I hadn't got round to doing). It does take some time, and a bit of elbow grease, but that's part of the owner satisfaction that I get out of owning a bike. I do not do this for other people's appreciation or attention for my bikes; I simply enjoy doing it, almost as much as riding (and so that I can sleep at night). Plus, a well sorted, clean, good working order bike will easily add a couple of hundred to a bike.
First step I'd say is to get it the bike up to a decent standard, and try and keep it there. If it's a wet week, the bike will be rinsed after it's used for the day, once it's cooled down, and before it's put away for the night. I usually spend a hungover Saturday morning doing a fairing-off clean if the weather's been particually bad. Once a bike is at a certain stage of cleanliness, so to speak, it's much easier to clean - hence why bikes look clean most of the time. If you can get a bike up to that kind of standard, the everyday dirt and grime just rinses off.
Ready for some proper cleaning:

Now to the nitty gritty, can't go into too much detail (might get carried away y'see), as I approach each component differently depending on its condition.
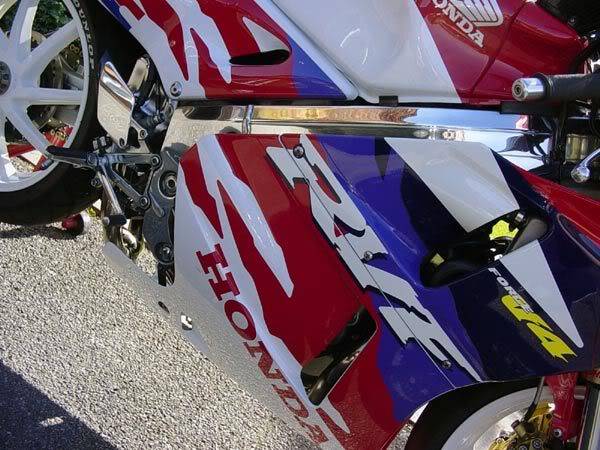
Bodywork
Use a decent soapy wash when you wash the bike, I use a Turtlewax one that has polishing wax within it. Taking the fairing off is sometimes easier at this stage (to clean the insides of them if anything else).Depending on how bad the weather's been, I might first saturate the bike in Autoglym Motorcycle Cleaner (it's a mild degreasant that can be used on nearly all motorcycle surfaces). Spray on, agitate with a brush if need be, then rinse off. Lather with the soap, working all around the bike, bottom to top and then back to bottom (rinse the sponge so as to not scratch bodywork) then rinse off, dry with a shammy leather to get rid of any water stains (they're a witch to polish out thereafter). Any tiny marks can be polished out if you're very careful - use either Brasso or Belgom Alu (and use, very, very lightly). This will allow you to polish out imperfections (the Alu will also leave a layer of Wax protection).
Once completely dry, get a decent high gloss wax Autoglym's good, Meguairs excellent (yet to get my hands on some Harley Wax). Apply with a clean rag (or an applicator pad), work out of sunlight, all around the bike. You want a nice mist covering all bodywork (watch for overrun in fairing gaps/fasteners though), leave for a few minues before buffing to a shine with a Microfibre. For a really good shine, once waxed, use a bit of Mr Sheene - gives a very smooth, very fine glossy finish - showroom condition easily and your bike would look amazing under multi-spot lights (petrol stations at night look cool) even with 15 year old paint. If the budget allows, invest in some stage 3 Meguairs (Corodura Wax) gives an even better shine/level of protection that will last for months. Don't be afraid to get carried away - paintwork looks so good if treated reguarly and letting the layers of wax build up - it'll look like it's got another few layers of laquer to the paintwork, as well as make the colours look even richer.
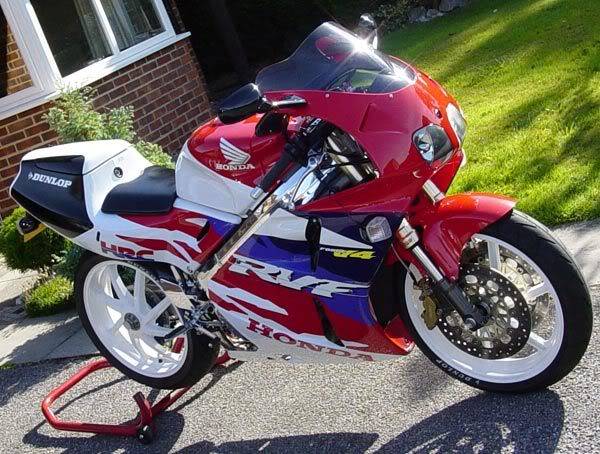
15 year old, original paintwork, given the Craig S treatment:

For areas of large single colour (such as wheels), get a Turtlewax Coloured Wax (the ones that sometimes come with a chipstick). Gives a good level shine/finish, quite cheap as well. I used a black (similar to back-to-black) for my wheels - very deep, almost black-chrome shine. Be careful if you want to use spray on polish here (or Mr. Sheene) - keep away from your tyres!
Remember to pay almost as much attention to the fairings insides as the outsides and use the same techniques above (may require more degreasing to rid them of excess chain lube/road grime from the tyres). People won't always notice if your fairing internals require a clean, but they will definately notice if your engine bay is gleaming!
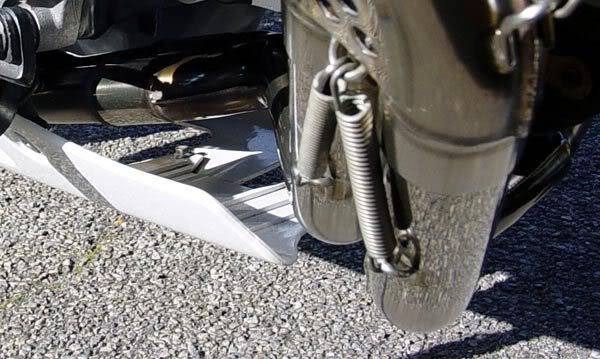
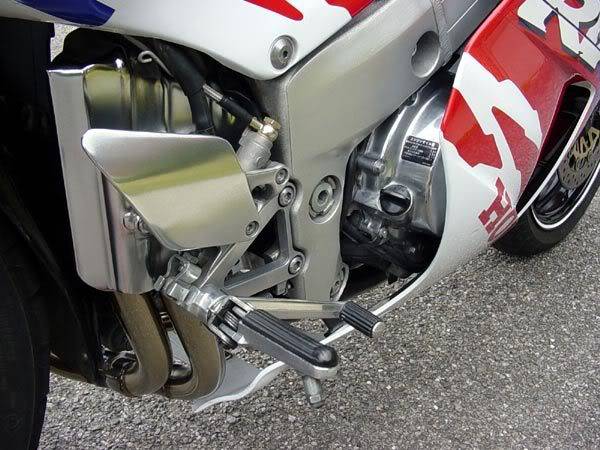
Metalwork
Depending on the finish really. I've recently wet'n'dried some areas of my bike to get a mirror finish - very intensive though, and doesn't leave much skin on your fingers. Though I found I got a better, more controlled finish than with polishing mops.
The basics for coated metal surfaces involve degreasing (Paraffin, Cillit Bang Green (aly friendly), Autoglym Aerosol Degreaser, WD40.....) then washing the surface. May need to repeat to make sure you get in all the knooks and crannies. Agitate with a paint/tooth brush (or cotton bud) if necessary. A bit of Mr. Sheene over the top works okay (but I found it doesn't react to nicely when heated up). Glass cleaner will work well to remove residue. Only use Autosol/Brasso very lightly on coated surfaces, otherwise it'll begin to polish too much.
For uncoated surfaces (polished frame, rearsets, exhaust hangers, levers, etc) Once dry, polish firstly with Autosol - keep buffing until the marks eventually rub out (it actually skims out imperfections in the metal, which is mixed with the dirt - that's what you see on your cloth). A lot of people add a bit, rub in until it goes dark grey and then immediately buff away. Don't do this. When the surface goes dark grey - keep buffing with the dirtying cloth until the shine comes through from under. Then buff away with a cleaner cloth. For a better, finer finish, use a bit of Brasso in the same way. Get a clean(er) cloth and polish again with no polish on the cloth - this gets rid of any excess. Repeat for Belgom Alu for even more bling - use a wax-on-wax-off technique.
For mirror finish you may want to invest in some polishing mops.(WARNING! THIS IS VERY PERMENANT AND MAY COMPROMISE THE VALUE OF YOUR BIKE (some see polished frames and what not as disguising crash damage) I did and they are currently sitting unused in my garage - I didn't like the lack of control they didn't give. So I use wet'n'dry. The original finish depends entirely on what grade to start with. Original finish - 240 grit; quite a bit of hard work at this stage, but it gets easier (relatively) when moving up the grades. Remove all surrounding bodywork/obstructions, fill a bucket of water, apply a tiny amount of washing up liquid, tear a hand sized patch of wet'n'dry up and then sand away like you would paintwork. Keep the surface saturated.
For painted/laquered surfaces you may want to try Nitro Morsing first. I have little experience with this stuff, but heard it works pretty well (won't remove the finish of a frame though). Anyway, gradually move up the grit levels - the key is to be patient - it will take a while. Miss a spot and leave a deep(ish) scratch in your metal work and it will show in the levels thereafter, so be careful not to just hack away in the first stages. Once you've moved up the 240-500-800-1000-1200-1500 grit stages and most sratches have been polished away (along with the original finish) dry thoroughly and then apply some Autosol to a cloth. Then Belgom Alu with a seperate cloth, buff to a mirror shine.
All in the details:

General Degreasing
A good degreaser is essential for all areas of the bike - especially for cleaning around the swing arm and soiled areas - taking the rear wheel out helps as well. Again, Autoglym's aerosol degreaser works pretty well as Cillit Bang Green or WD40; Parrafin even better (and cheap) - agitate with an old paint brush for real stubborn stuff, or get scrubbing with a brillo pad if you want quite a flat finish. This is a tricky and often labourious area, requiring lots of elbow grease to get the bike back to the way it should. Be patient, and keep at it, the results can be quite rewarding. I've heard oven cleaner can eat through alot of baked on road crap, but be careful when using it on soft aluminium (it could eat into it).


Remember to relube any components where necessary.
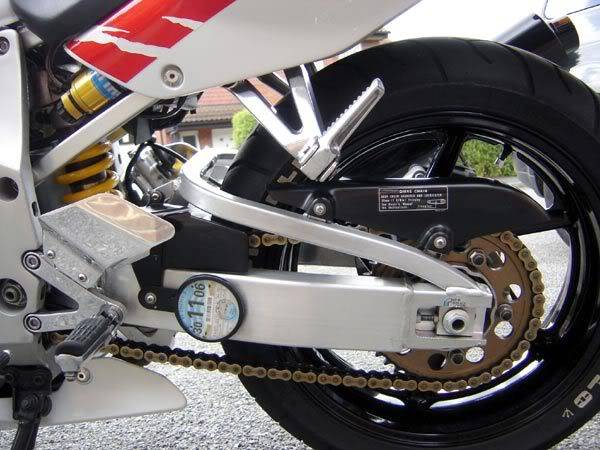
Chains
There are a few techniques; some people just rely on their Scotoiler to do all the work. That's not good enough for me. Liberally apply a degreaser - Parrafin again - to your chain. You want to absolutely drench the thing in the stuff so all the muck, grit, road kill, etc just rinses out (make sure you cover the floor on which you're working, this stuff will get everywhere). Keep rotating the chain to work around all areas - do the hub, the inside of the front sprocket cover (check the speedo cable whilst you're at it) - Everywhere. Once degreased, whipe off with a rag until dry, pay attention to cleaning the inside and outside of the chain for extra bling. Then apply a good coating of Chainsaw Lubricant (I've found this much better than oil and spray chain waxes (which go into a sticky, gungey (and sometimes green!) mess after a couple of weeks of use). Pour a little lubricant into a cap, and wipe in with a cloth, working into the o-rings whilst moveing the chain around. Wipe off the excess to reveal a non-fling, spotless, wet-looking chain. Good as new.

That's the major areas - sorry if it's a bit long winded. One thing I've found is that the cleaner a bike is, the more scruitiny it gets - plus no one believes that it's your everyday, all weather transport. Once the big areas are clean and kept clean, then you can work around to the detailing (this is where I'm at at the moment, and hence why I'm always finding new areas that need work). Same theories apply, but it's easier to spend a weekend or so doing each area. For example, my rearsets were done a couple of weeks ago - taken off the bike, disassembled, cleaned, polished and then reassembled - it's really the only way to get all the muck off - some nooks and crannies are just unreachable when the parts are all together.
Other areas that just won't clean up - rub down and respray/powder coat/replace/etc to make them like new.
Another tip - don't try and attempt to restore an entire bike in a weekend. If you plan on keeping the bike for a period of time, do it in stages. Get the bike to a general level of clean and then think "I'm going to be hungover and homebound on Saturday 11am - 3pm - good time for a fairing off clean me'thinks...." (and the like). It's also a good mode of practice if you're modifying a bike, as said parts will have to be removed anyway - may be an idea to couple the installation of a new exhaust system with an engine bay overhaul, for example.
And don't worry about being brandished an obsessive, I think in many parts, I've got that area fully covered.
Having written this for a couple of other forums (don't worry, not in one go (I hope I'm not that sad)), I thought I might add a few tips and tricks of the trade here.
With the sun ready to raise once again, how about a spot of spring cleaning?
Anyway, cleaning my bike is kind of like a maintenance routine - some think I'm quite obsessive when it comes to keeping the grime off, but I look at it as more an appreciation for the bike. I also like to take the opputunity to make sure everything is in tip top working order. More often then not, a proper clean also requires a strip down, and a disassemberly of surrounding parts, so all the nooks and crannies can be sorted.
The key, is in the details. Viewers of the bike tend to see it as a whole and won't spot every single change you've made (even, in some cases (like me), it's down to almost every last nut and bolt). However, I believe that if the minor details are also considered, the finished result is so much better. Far too often, I see a few bikes with spotless paintjobs, but the infrastructure underneath is a right pig (kind of like the Konica actually).
I've found cleaning a bike is never complete; even if, to the 'untrained eye' no work appears to need doing or that it very rarely sees rain. There will always be something that requires attention, a stonechip that requires polishing out, a bolt that's showing some corrosion. The only time a bike appears to be mint is when it rolls off the production line, or someone's got really anal about keeping their bike wrapped in cotton wool (and where's the fun in that). Nothing wrong with that, as there's always something to strive for.
But, mint, in those cases, is not pracitical, so best to aim for 'very good condition'. (Unlike now, a couple of years ago, I used my bikes as commuters, all year round, in all weathers. The RVF, in the early months of ownership saw everything the cruel British winter could throw at it, so offers a good base for realistic cleaning). Such a project wasn't done over night - it took 9 months. After a 'general clean' I'll clean/polish some other area that I hadn't got round to yet (for example; if I had been using the bike during the week; giving it a clean and it had remained cleani up to the weekend, there would still be some areas that I hadn't got round to doing). It does take some time, and a bit of elbow grease, but that's part of the owner satisfaction that I get out of owning a bike. I do not do this for other people's appreciation or attention for my bikes; I simply enjoy doing it, almost as much as riding (and so that I can sleep at night). Plus, a well sorted, clean, good working order bike will easily add a couple of hundred to a bike.
First step I'd say is to get it the bike up to a decent standard, and try and keep it there. If it's a wet week, the bike will be rinsed after it's used for the day, once it's cooled down, and before it's put away for the night. I usually spend a hungover Saturday morning doing a fairing-off clean if the weather's been particually bad. Once a bike is at a certain stage of cleanliness, so to speak, it's much easier to clean - hence why bikes look clean most of the time. If you can get a bike up to that kind of standard, the everyday dirt and grime just rinses off.
Ready for some proper cleaning:
Now to the nitty gritty, can't go into too much detail (might get carried away y'see), as I approach each component differently depending on its condition.
Bodywork
Use a decent soapy wash when you wash the bike, I use a Turtlewax one that has polishing wax within it. Taking the fairing off is sometimes easier at this stage (to clean the insides of them if anything else).Depending on how bad the weather's been, I might first saturate the bike in Autoglym Motorcycle Cleaner (it's a mild degreasant that can be used on nearly all motorcycle surfaces). Spray on, agitate with a brush if need be, then rinse off. Lather with the soap, working all around the bike, bottom to top and then back to bottom (rinse the sponge so as to not scratch bodywork) then rinse off, dry with a shammy leather to get rid of any water stains (they're a witch to polish out thereafter). Any tiny marks can be polished out if you're very careful - use either Brasso or Belgom Alu (and use, very, very lightly). This will allow you to polish out imperfections (the Alu will also leave a layer of Wax protection).
Once completely dry, get a decent high gloss wax Autoglym's good, Meguairs excellent (yet to get my hands on some Harley Wax). Apply with a clean rag (or an applicator pad), work out of sunlight, all around the bike. You want a nice mist covering all bodywork (watch for overrun in fairing gaps/fasteners though), leave for a few minues before buffing to a shine with a Microfibre. For a really good shine, once waxed, use a bit of Mr Sheene - gives a very smooth, very fine glossy finish - showroom condition easily and your bike would look amazing under multi-spot lights (petrol stations at night look cool) even with 15 year old paint. If the budget allows, invest in some stage 3 Meguairs (Corodura Wax) gives an even better shine/level of protection that will last for months. Don't be afraid to get carried away - paintwork looks so good if treated reguarly and letting the layers of wax build up - it'll look like it's got another few layers of laquer to the paintwork, as well as make the colours look even richer.
15 year old, original paintwork, given the Craig S treatment:
For areas of large single colour (such as wheels), get a Turtlewax Coloured Wax (the ones that sometimes come with a chipstick). Gives a good level shine/finish, quite cheap as well. I used a black (similar to back-to-black) for my wheels - very deep, almost black-chrome shine. Be careful if you want to use spray on polish here (or Mr. Sheene) - keep away from your tyres!
Remember to pay almost as much attention to the fairings insides as the outsides and use the same techniques above (may require more degreasing to rid them of excess chain lube/road grime from the tyres). People won't always notice if your fairing internals require a clean, but they will definately notice if your engine bay is gleaming!
Metalwork
Depending on the finish really. I've recently wet'n'dried some areas of my bike to get a mirror finish - very intensive though, and doesn't leave much skin on your fingers. Though I found I got a better, more controlled finish than with polishing mops.
The basics for coated metal surfaces involve degreasing (Paraffin, Cillit Bang Green (aly friendly), Autoglym Aerosol Degreaser, WD40.....) then washing the surface. May need to repeat to make sure you get in all the knooks and crannies. Agitate with a paint/tooth brush (or cotton bud) if necessary. A bit of Mr. Sheene over the top works okay (but I found it doesn't react to nicely when heated up). Glass cleaner will work well to remove residue. Only use Autosol/Brasso very lightly on coated surfaces, otherwise it'll begin to polish too much.
For uncoated surfaces (polished frame, rearsets, exhaust hangers, levers, etc) Once dry, polish firstly with Autosol - keep buffing until the marks eventually rub out (it actually skims out imperfections in the metal, which is mixed with the dirt - that's what you see on your cloth). A lot of people add a bit, rub in until it goes dark grey and then immediately buff away. Don't do this. When the surface goes dark grey - keep buffing with the dirtying cloth until the shine comes through from under. Then buff away with a cleaner cloth. For a better, finer finish, use a bit of Brasso in the same way. Get a clean(er) cloth and polish again with no polish on the cloth - this gets rid of any excess. Repeat for Belgom Alu for even more bling - use a wax-on-wax-off technique.
For mirror finish you may want to invest in some polishing mops.(WARNING! THIS IS VERY PERMENANT AND MAY COMPROMISE THE VALUE OF YOUR BIKE (some see polished frames and what not as disguising crash damage) I did and they are currently sitting unused in my garage - I didn't like the lack of control they didn't give. So I use wet'n'dry. The original finish depends entirely on what grade to start with. Original finish - 240 grit; quite a bit of hard work at this stage, but it gets easier (relatively) when moving up the grades. Remove all surrounding bodywork/obstructions, fill a bucket of water, apply a tiny amount of washing up liquid, tear a hand sized patch of wet'n'dry up and then sand away like you would paintwork. Keep the surface saturated.
For painted/laquered surfaces you may want to try Nitro Morsing first. I have little experience with this stuff, but heard it works pretty well (won't remove the finish of a frame though). Anyway, gradually move up the grit levels - the key is to be patient - it will take a while. Miss a spot and leave a deep(ish) scratch in your metal work and it will show in the levels thereafter, so be careful not to just hack away in the first stages. Once you've moved up the 240-500-800-1000-1200-1500 grit stages and most sratches have been polished away (along with the original finish) dry thoroughly and then apply some Autosol to a cloth. Then Belgom Alu with a seperate cloth, buff to a mirror shine.
All in the details:
General Degreasing
A good degreaser is essential for all areas of the bike - especially for cleaning around the swing arm and soiled areas - taking the rear wheel out helps as well. Again, Autoglym's aerosol degreaser works pretty well as Cillit Bang Green or WD40; Parrafin even better (and cheap) - agitate with an old paint brush for real stubborn stuff, or get scrubbing with a brillo pad if you want quite a flat finish. This is a tricky and often labourious area, requiring lots of elbow grease to get the bike back to the way it should. Be patient, and keep at it, the results can be quite rewarding. I've heard oven cleaner can eat through alot of baked on road crap, but be careful when using it on soft aluminium (it could eat into it).
Remember to relube any components where necessary.
Chains
There are a few techniques; some people just rely on their Scotoiler to do all the work. That's not good enough for me. Liberally apply a degreaser - Parrafin again - to your chain. You want to absolutely drench the thing in the stuff so all the muck, grit, road kill, etc just rinses out (make sure you cover the floor on which you're working, this stuff will get everywhere). Keep rotating the chain to work around all areas - do the hub, the inside of the front sprocket cover (check the speedo cable whilst you're at it) - Everywhere. Once degreased, whipe off with a rag until dry, pay attention to cleaning the inside and outside of the chain for extra bling. Then apply a good coating of Chainsaw Lubricant (I've found this much better than oil and spray chain waxes (which go into a sticky, gungey (and sometimes green!) mess after a couple of weeks of use). Pour a little lubricant into a cap, and wipe in with a cloth, working into the o-rings whilst moveing the chain around. Wipe off the excess to reveal a non-fling, spotless, wet-looking chain. Good as new.
That's the major areas - sorry if it's a bit long winded. One thing I've found is that the cleaner a bike is, the more scruitiny it gets - plus no one believes that it's your everyday, all weather transport. Once the big areas are clean and kept clean, then you can work around to the detailing (this is where I'm at at the moment, and hence why I'm always finding new areas that need work). Same theories apply, but it's easier to spend a weekend or so doing each area. For example, my rearsets were done a couple of weeks ago - taken off the bike, disassembled, cleaned, polished and then reassembled - it's really the only way to get all the muck off - some nooks and crannies are just unreachable when the parts are all together.
Other areas that just won't clean up - rub down and respray/powder coat/replace/etc to make them like new.
Another tip - don't try and attempt to restore an entire bike in a weekend. If you plan on keeping the bike for a period of time, do it in stages. Get the bike to a general level of clean and then think "I'm going to be hungover and homebound on Saturday 11am - 3pm - good time for a fairing off clean me'thinks...." (and the like). It's also a good mode of practice if you're modifying a bike, as said parts will have to be removed anyway - may be an idea to couple the installation of a new exhaust system with an engine bay overhaul, for example.
And don't worry about being brandished an obsessive, I think in many parts, I've got that area fully covered.

craigs23- CBT Novice
- Number of posts : 36
 Age : 41
Location : SE UK
My bike(s) : NC30, R6
Registration date : 2007-11-06
Re: My Basic Guide to Cleaning
![]() by Firebladeradmin Thu 10 Jan 2008, 20:37
by Firebladeradmin Thu 10 Jan 2008, 20:37
Thanks for the info craig.........I'll be off all next summer so will follow your tips 

Firebladeradmin- Website/Forum Owner

- Number of posts : 3124
Registration date : 2007-07-19
Re: My Basic Guide to Cleaning
![]() by Repsol Rider Thu 10 Jan 2008, 20:41
by Repsol Rider Thu 10 Jan 2008, 20:41
An easier way is just don't use ya bike lmao
Repsol Rider- BSB Racer
- Number of posts : 399
Age : 56
Location : Worcester
My bike(s) : 2008 R1
Registration date : 2007-10-06
Re: My Basic Guide to Cleaning
![]() by legins Thu 10 Jan 2008, 21:28
by legins Thu 10 Jan 2008, 21:28
Im knackered just reading that however bloody good writeup will use this weekend

legins- MotoGP Legend
- Number of posts : 1051
Age : 59
Location : On the 7th day god created Manchester
My bike(s) : 93 Blade but hunting for an 06 Blade
Registration date : 2007-07-23
Repsol Rider- BSB Racer
- Number of posts : 399
Age : 56
Location : Worcester
My bike(s) : 2008 R1
Registration date : 2007-10-06
Re: My Basic Guide to Cleaning
![]() by stuart Fri 11 Jan 2008, 08:48
by stuart Fri 11 Jan 2008, 08:48
All good tips again mate.
Sadly I'm a bit of a lazy person, so 30 mins tops is all my bikes ever get.
Sadly I'm a bit of a lazy person, so 30 mins tops is all my bikes ever get.

stuart- Global Moderator

- Number of posts : 2823
Age : 68
Location : sunderland
My bike(s) : Tiger 800
Registration date : 2007-07-23

CBRRRT- Trackday Novice
- Number of posts : 143
Age : 62
Location : Harwich
My bike(s) : 1996 Fireblade
Registration date : 2009-12-19
» Suspension setup guide / advice
» Suspension Bush and bearings checking guide
» Step by step guide to cutting down your can
» Suspension Bush and bearings checking guide
» Step by step guide to cutting down your can
www.firebladeriders.org :: Fireblade Knowledgebase and Tech Help :: Technical Hints and Tips :: Idiots Guides
Page 1 of 1
Permissions in this forum:
You cannot reply to topics in this forum|
|
|